What’s New in Citrix Apps & Desktops 7.17
This product release includes the following new, modified, and enhanced features.
Install and upgrade VDAs: additional restart
An additional restart occurs when upgrading a VDA to version 7.17 (or a later supported version). This restart is required after the installer removes one of the MSIs (ICA WS/Ts) and then installs the new version of that MSI.
Install and upgrade VDAs: VDA supportability tools option
When you install a VDA, you can now choose whether to install a VDA supportability MSI that includes Citrix tools. You can use the tools to check items such as the overall health of your VDA and connection quality. In the installer’s graphical interface, select or clear a check box on the Additional Components page. In the command line interface, use the /exclude “Citrix Supportability Tools” to prevent installation of the MSI that contains the tools.
Install and upgrade VDAs: Removal of PDF printer driver option
The VDA installers no longer offer options to control Universal Print Server PDF printer driver installation. The PDF printer driver is now always installed automatically. When you upgrade to the 7.17 VDA (or a later supported version), any previously installed Citrix PDF printer driver is automatically removed and replaced with the latest version.
Launch applications from a published desktop
When users launch a published application from within a published desktop, you can use PowerShell to control whether the application is launched in that desktop session or as a published application in the same Delivery Group. By default, the application in the published desktop session is launched. For details, see Control local launch of applications on published desktops.
Federated Authentication Service
The Citrix Federated Authentication Service released with XenApp and XenDesktop 7.17 stores its configuration data, including user and registration authority certificates, in an embedded database. In previous releases, this data was stored in the registry. When upgrading to this release, all Federated Authentication Service configuration data except user certificates is migrated from the registry to the embedded database. Therefore, we recommend that before upgrading, you erase all user certificates with the following FAS PowerShell command:
Add-PSSnapin Citrix.a*
Remove-FasUserCertificate
Director
PIV smart card authentication support. Apart from the form based and Integrated Windows authentication of users, Director now supports Personal Identity Verification (PIV) based smart card authentication. This feature is useful for organizations and government agencies that use smart card based authentication for access control.
To log on to Director, insert your smart card into the smart card reader, and enter your smart card token. After you are authenticated, you can access Director without having to provide additional credentials on the Director logon page.
For more information on the configuration required for smart card based authentication, see Configure PIV smart card authentication.
For more information on using Director with smart card based authentication, see the Use Director with PIV based smart card authentication section in the Director article.
Virtual Delivery Agents (VDAs) 7.17
Version 7.17 of the VDA for Server OS and the VDA for Desktop OS include the following enhancements:
- Browser content redirection blacklist. You can create a blacklist policy along with the existing Access Control List (ACL) policy. The URLs in this blacklist policy aren’t redirected. For example, you add a company’s URL to the whitelist, but you don’t want a specific URL at the company website to be redirected. Add that specific URL to the blacklist and browser content redirection doesn’t occur for that URL. For more information, see Browser content redirection.
- Browser content redirection video fallback prevention. If client redirection fails, you can prevent fallback of HTML5 videos to the server side. Use the existing Windows media fallback prevention policy to prevent server side rendering of video elements. Setting this policy suppresses only the video elements and not the HTML content of the page. The HTML content is rendered on the server. For more information, see Browser content redirection.
- Citrix webcam video compression for 64-bit applications. Support for 64-bit Citrix webcam video compression is available.
Important: The 64-bit application support requires H.264 compression.
- Lossless compression codec (MDRLE). A higher compression ratio MDRLE encoder is added to Thinwire. The MDRLE codec consumes less bandwidth in typical desktop sessions than the 2DRLE codec. If the codec is supported on the server and client sides, it’s used instead of 2DRLE. For more information, see “Encoding methods” in the Thinwire article.
- Show or hide the remote language bar. The language bar displays the preferred input language in an application session. If this feature is enabled (the default), you can show or hide the language bar from the Advanced Preferences > Language bar UI in Citrix Receiver for Windows. You can disable this feature using a registry setting on VDA side. For more information, see “Show or hide the remote language bar” in the HDX article and Improve the user experience.
- Text-based session watermarks to deter and track data theft. This feature allows you to configure textual watermarks containing information to help track data theft. This traceable information appears on the session desktop as a deterrent to those using photographs and screen captures to steal data.
Also, see the install and upgrade changes described in the previous section, XenApp and XenDesktop 7.17.
After upgrading your VDAs to this version (from version 7.9 or later), you do not need to update the machine catalog’s functional level. The default (7.9 (or newer …)) remains the current functional level. For information, see VDA versions and functional levels.
Citrix Licensing 11.14
Citrix Licensing 11.14 contains new features and fixed and known issues.
Upgrading XenApp/XenDesktop 7.16 to 7.17 Process
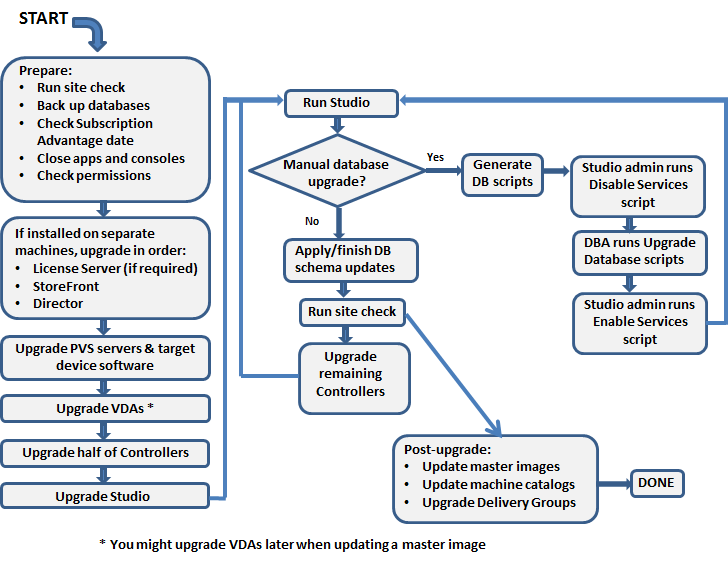
- Make sure that your Subscription Advantage date for licenses is valid.
- Back up the Delivery Controller databases.
- Upgrade Director if it is installed on a separate machine from your Delivery Controllers.
- Backup templates and upgrade hypervisors (optional).
- Upgrade Provisioning Services if in use.
- Upgrade the Virtual Delivery Agent and perform an image update on all master images.
- Upgrade half of your Delivery Controllers (all components).
- Use the upgraded version of Studio to perform Site upgrade.
- Upgrade your remaining Delivery Controllers (all components).
Below i will cover:-
- Director/Studio/Delivery Controller/License Server upgrade (all in single server)
- Storefront on Separate Server
- Upgrade of a Server OS VDA
StoreFront Upgrade
Step 1: Download the Citrix 7.17 ISO from the Citrix Downloads (XenApp_and_XenDesktop_7_17.iso) and Click Upgrade Studio and Server Components

Step 2: Accept the terms and license agreement, click on Next

Step 3: At Ensure a Successful upgrade, tick I’m ready to continue , Click next
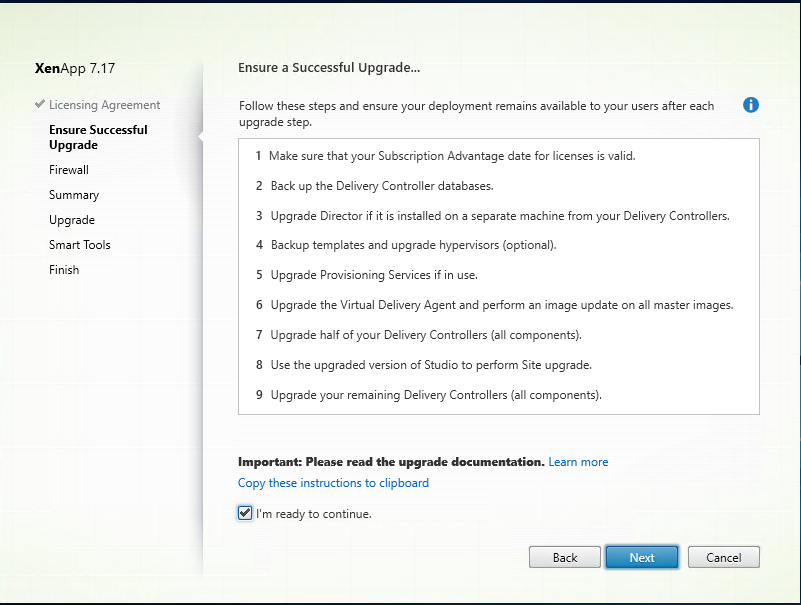
Step 4: Leave configuration at “Automatically”, Click Next

Step 5: At Summary screen, confirm everything is correct, Click Upgrade

Step 6: Click OK at warning that you cannot cancel the upgrade to proceed..

Step 7: At Finished Installation. Click “Finish”
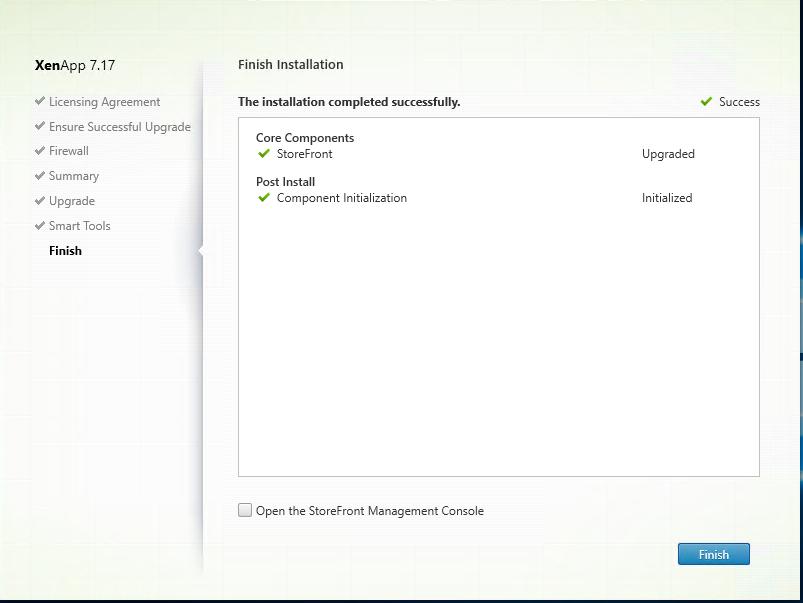
Step 8: Repeat this on every StoreFront Server
Upgrade VDA’s (On Master Image)
Step 1: Download the Citrix 7.17 ISO from the Citrix Downloads (XenApp_and_XenDesktop_7_17.iso) and Click Upgrade Studio and Server Components

Step 2: At additional components, click next
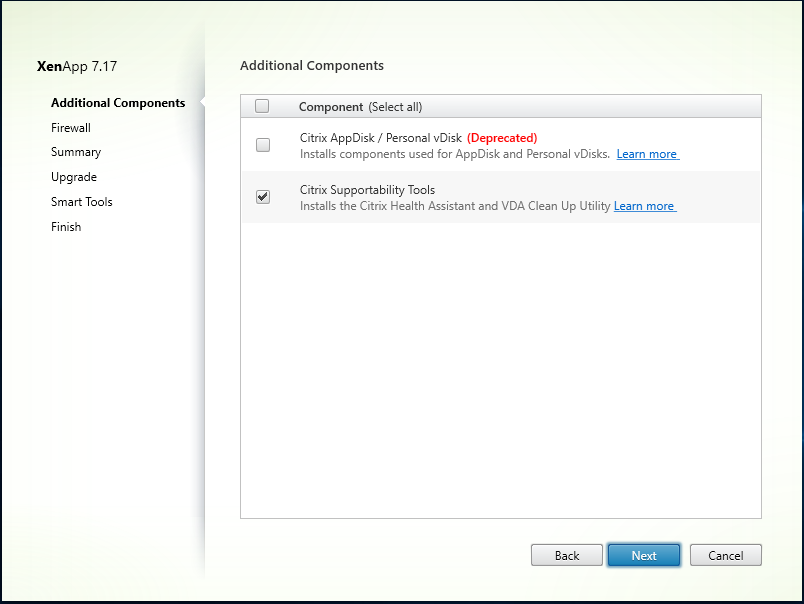
Step 3: Leave configuration at “Automatically”, Click Next

Step 4: At Summary screen, confirm everything is correct, Click Upgrade

Step 5: Click OK at warning that you cannot cancel the upgrade to proceed..

Step 6: Core components will be upgraded.
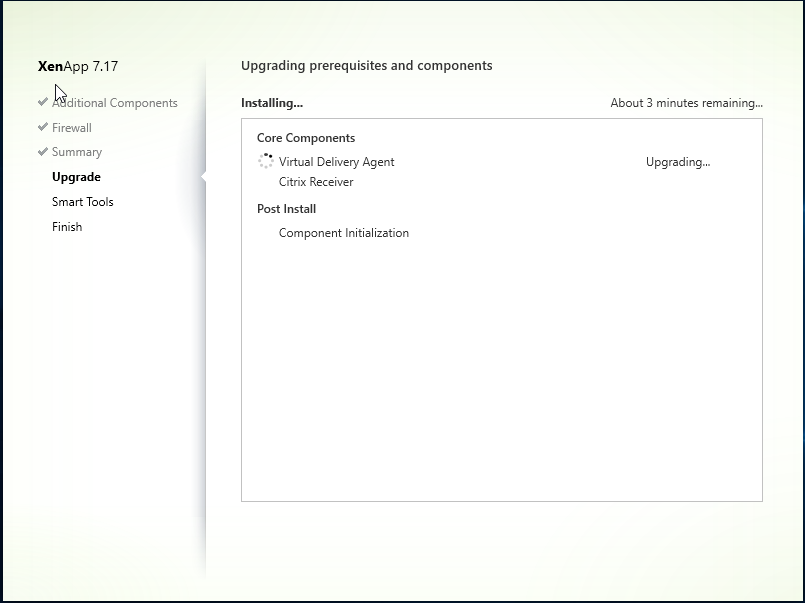
Step 7: A message “The machine needs to be restarted before the upgrade can continue”. Click “OK”

Step 8: After reboot the upgrade components will continue.
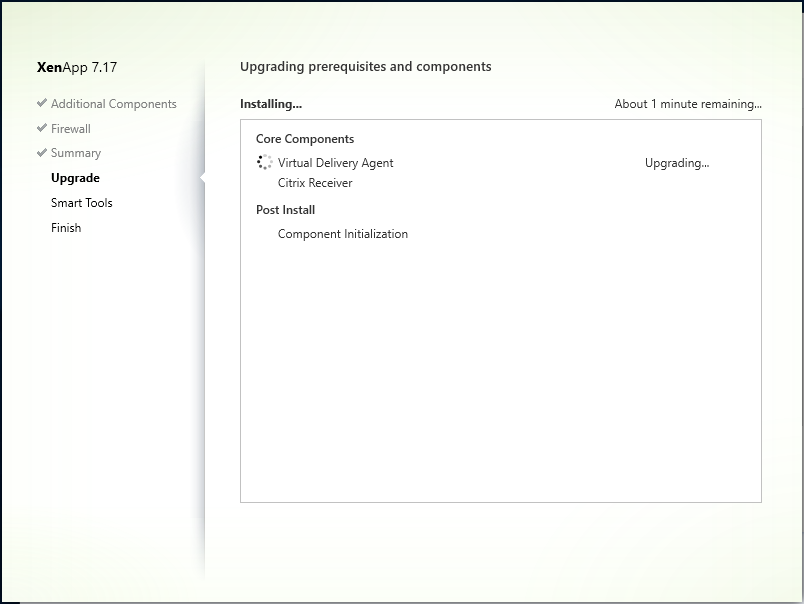
Step 9: After update progress has completed. Select “I do not want to participate in Call Home”. Click Next

Step 10: At Finished Installation, Click “Finish” and reboot of VDA will occur.
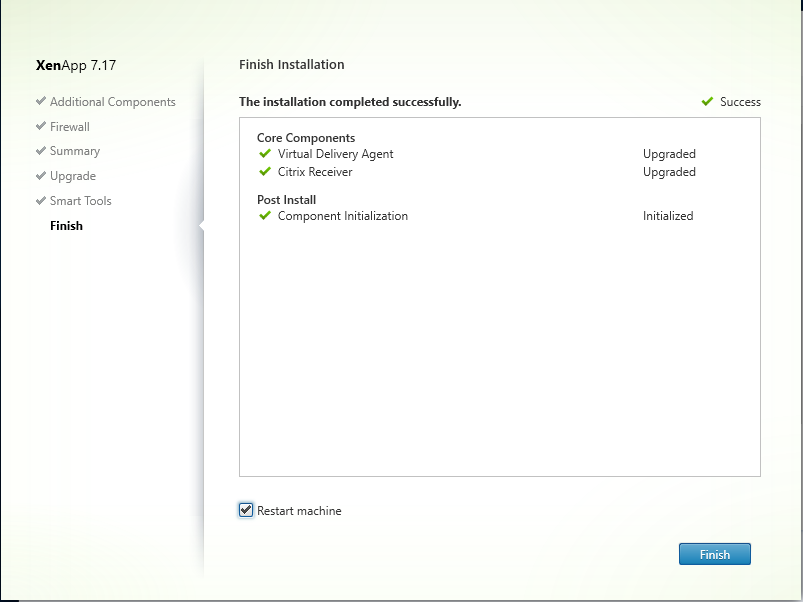
Step 11: Repeat this in all Master Images used in Site.
Delivery Controller Upgrade (& License/Director)
Step 1: Download the Citrix 7.17 ISO from the Citrix Downloads (XenApp_and_XenDesktop_7_17.iso) and Click Upgrade Studio and Server Components
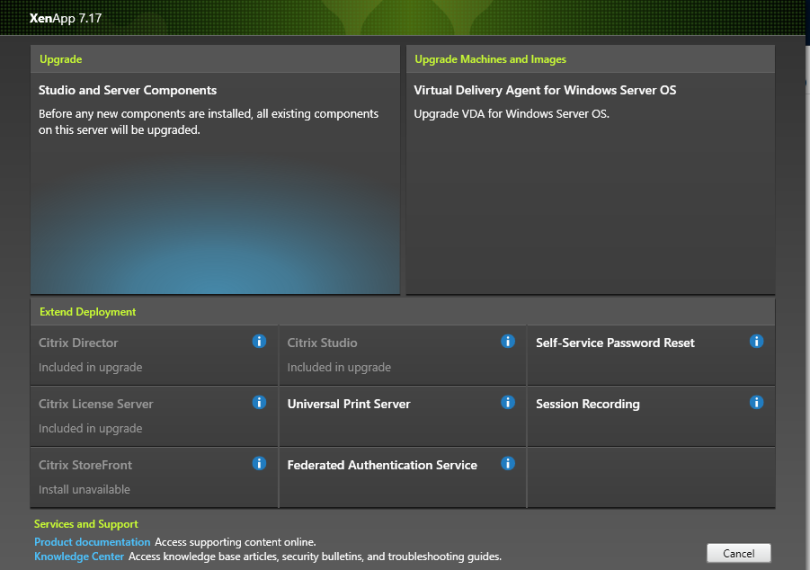
Step 2: Accept the terms and license agreement, click on Next

Step 3: At Ensure a Successful upgrade, tick I’m ready to continue , Click next
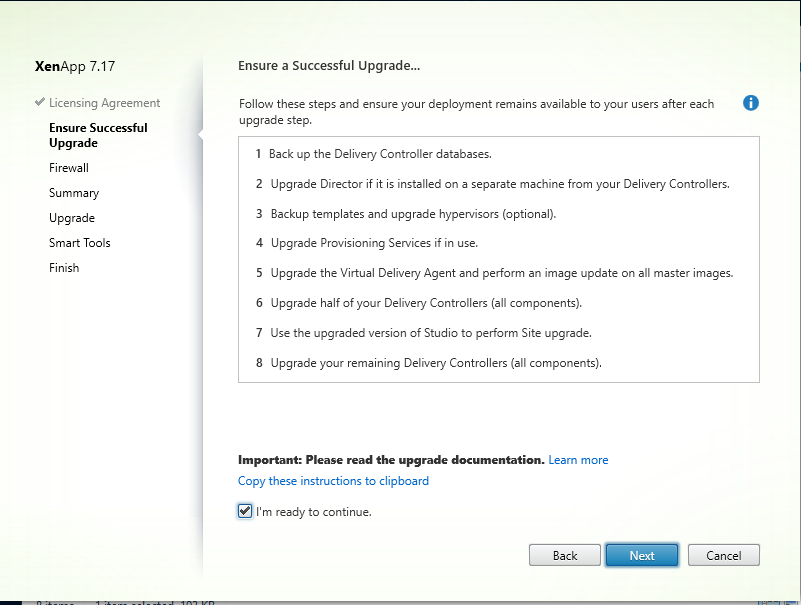
Step 4: Leave configuration at “Automatically”, Click Next

Step 5: At Summary screen, confirm everything is correct, Click Upgrade
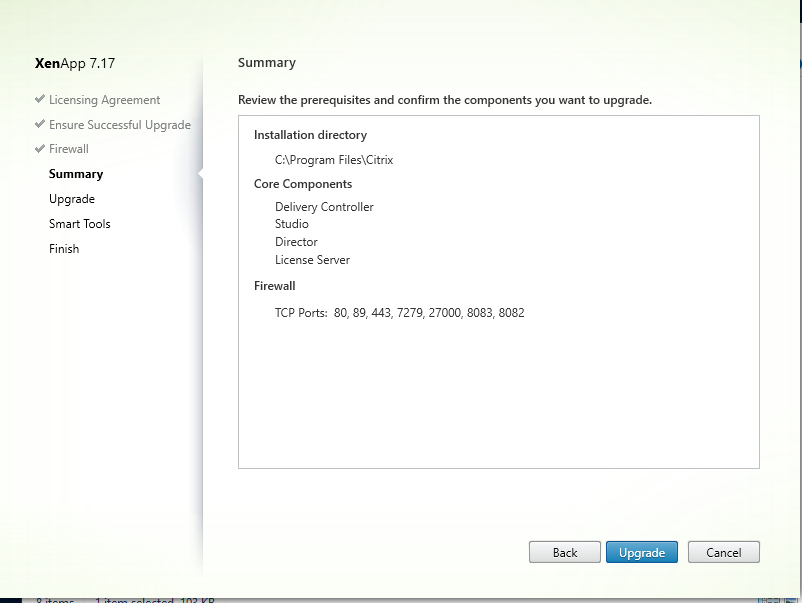
Step 6: Click OK at warning that you cannot cancel the upgrade to proceed..

Step 7: Upgrade will now proceed!
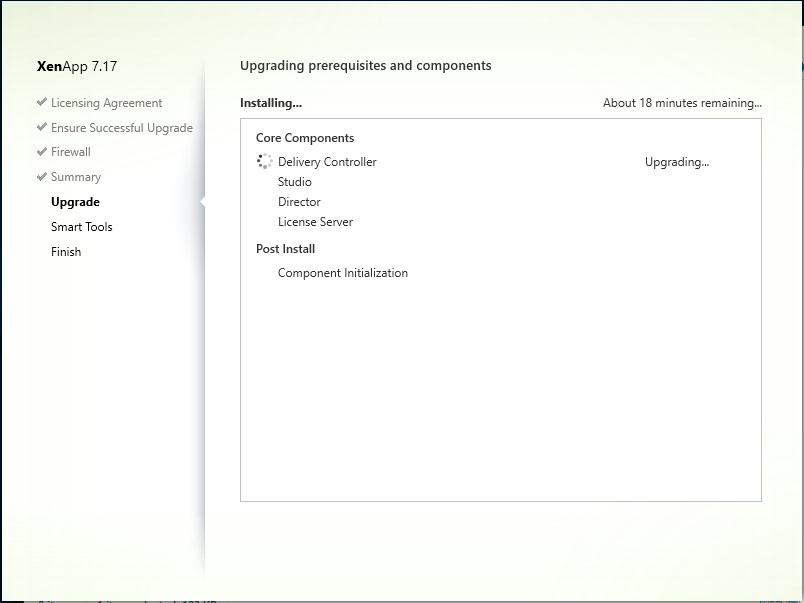
Step 8: The install will require a reboot, click Close and reboot will be initiated

Step 9: Server will be rebooted.

Step 10: At Smart Tools, Select i do not want to connect to Smart Tools or Call Home. Click Next
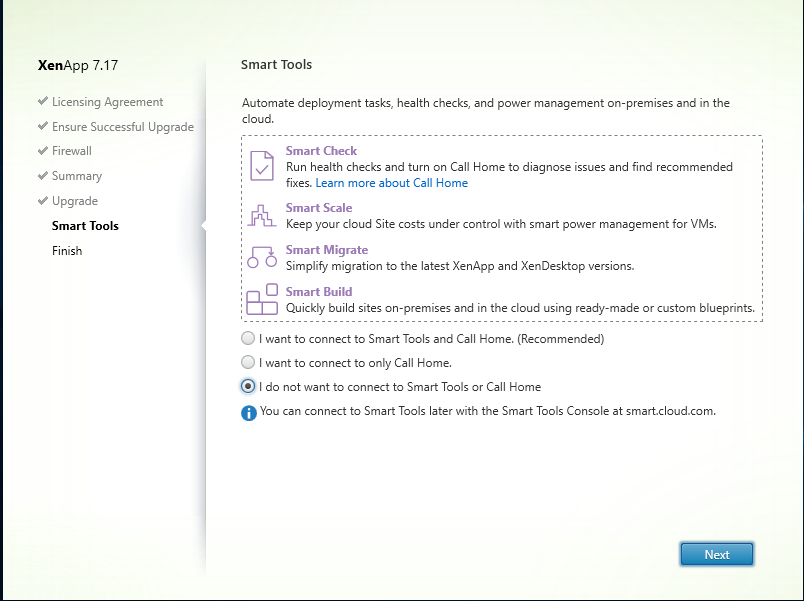
Step 11: Click Finish to complete the upgrade. Ensuring Launch Studio is still ticked.
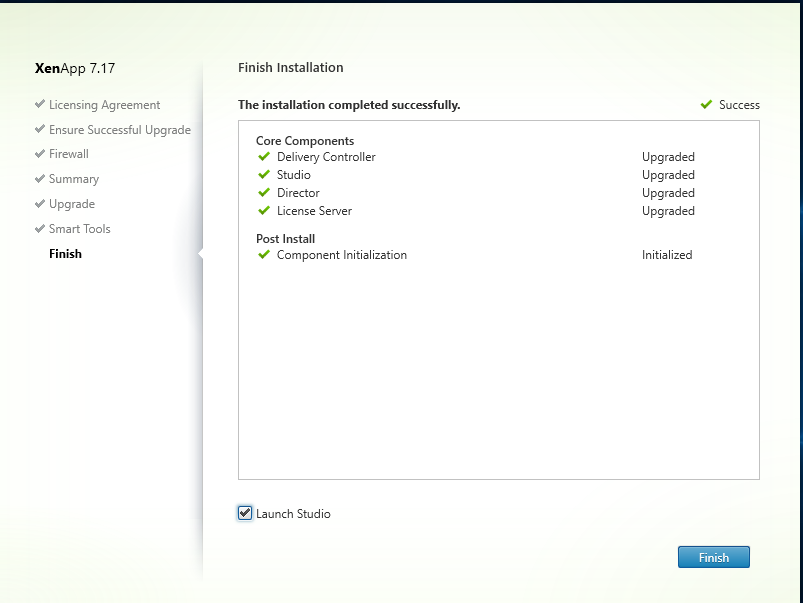
Step 12: Repeat this on exactly half of the delivery controllers on the site.
Step 13: Launch Citrix Studio, click Start the automatic Site upgrade

Step 14: Select, I am ready to upgrade. Click Upgrade
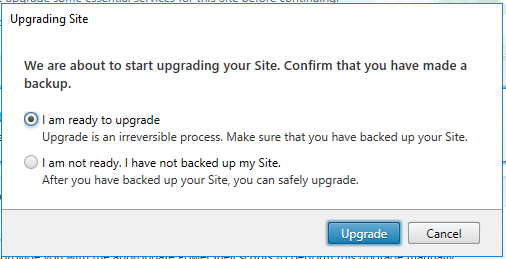
Step 15: Upgrade of Site/DB’s will begin and take a few minutes

Step 16: Site upgrade will show as complete when done.

Step 17: In Citrix Studio\Common Tasks\Site – Perform Site Test and confirm all tests pass successfully.

Step 18: Repeat this the rest of the delivery controllers on the site.
